This post is going to be a short walkthrough on how to use Node and KnockoutJS to create a simple single page application.
What is a Single Page Application?
…a web application or web site that fits on a single web page with the goal of providing a more fluid user experience akin to a desktop application
That’s according to Wikipedia. For the purposes of this post, a single page application (or SPA) will mean a web application for which we only want to serve up one HTML page.
That page will then link to a couple of javascript files which, in cohort with a templating engine, will create and manipulate the content of the page. All communication with the server will be through AJAX, and will only ever transfer JSON data – no UI content.
We will be using node to serve the page (plus scripts, styles, etc.) and to handle the API calls, while knockout will provide us with the client-side interaction and templating.
Serving the Single Page
First up: we need to configure node to serve up our single HTML page:
<html>
  <body>
    <h1>I'm a single page application!</h1>
  </body>
</html>
We’ll be adding more to that later, but let’s get node working first.
Express
We’re going to be using expressjs to implement the more interesting API calls later on, but we can make use of it here to serve up a static file for us as well. To install express, use the node package manager by running the command below.:
npm install expressNow we need to create a javascript file – app.js – to run in node. This file will grab a reference to express using the require function and will start listening on port 3000.
var express = require('express'),
  app = express();

//start listening on port 3000
app.listen(3000);
Let’s see what happens when we run this. In a command prompt, browse to the folder containing app.js and enter the command below to start node.
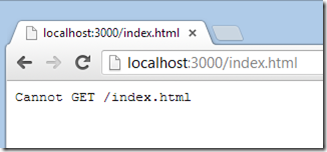
node app.jsNext, open your favourite browser and navigate to http://localhost:3000/index.html. You should see something like this:
This is express telling us that it cannot resolve the URL “/index.html”, which isn’t unreasonable - we haven’t told it how to yet. We want express to respond with the contents of static files from the current folder (eventually including our styles and javascript), so let’s get that set up.
We do this in the app.configure method (before we call app.listen) using the express.static method and the current application folder (stored in the special __dirname node variable).
app.configure(function() {
  //tell express to serve static files from the special
  //node variable __dirname which contains the current
  //folder
  app.use(express.static(__dirname));
});
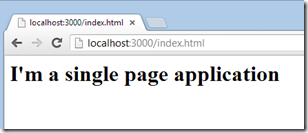
Restart the node application, refresh the browser and you should now see the content from our single page:
Conveniently, express will automatically return index.html if you don’t specify a file name, so we can get the same response from http://localhost:3000/
Creating the Page
The next step is to start building up content in the page. We are going to need a few javascript resources – jQuery for the AJAX calls, Knockout for the view model – and I’m going to include my command pattern implementation to help with the actions.
For the page itself I’m going to pull in a page.js to contain our page-specific code, and we should probably include a stylesheet as I can’t stand Times New Roman.
Our HTML page now looks like this:
<html>
  <head>
    <title>SPA Example</title>
    <link rel="stylesheet" href="spa.css" />
  </head>
  <body>
    <h1>I'm a single page application</h1>
  </body>
  <script src="http://ajax.aspnetcdn.com/ajax/jQuery/jquery-1.9.0.min.js"></script>
  <script src="http://ajax.aspnetcdn.com/ajax/knockout/knockout-2.2.1.js"></script>
  <script src="https://raw.github.com/stevegreatrex/JsUtils/master/JsUtils/utils.min.js"></script>
  <script src="page.js"></script>
</html>
I’m using a CDN for jQuery and knockout, and I’m pulling my command implementation direct from Github (sorry Github!). I’m assuming that both spa.css and page.js are in the same folder as index.html
Refresh the browser again (no need to restart node this time) and…
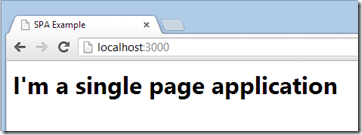 Much better!
Creating the View Model
As this is just a sample application I don’t want to get too distracted by the view model – the purpose of this post is demonstrate the end-to-end rather than to focus on a specific functionality. With that in mind, let’s use the example functionality of a basic todo app (as that seems to be the thing to do).
Our view model will start off with a list of todo items which we will store in a knockout observableArray. Each todo item will have a name and a complete flag.
For the time being, we’ll bootstrap the collection with a few sample items.
var TodoViewModel = function(data) {
  this.name = ko.observable(data.name);
  this.complete = ko.observable(data.complete);
};

var TodoListViewModel = function() {
  this.todoItems = ko.observableArray();
};

$(function() {
  var viewModel = new TodoListViewModel();

  //insert some fake todo items for now...
  viewModel.todoItems.push(
    new TodoViewModel({ name: 'Pending Item', complete: false })
  );
  viewModel.todoItems.push(
    new TodoViewModel({ name: 'Completed Item', complete: true })
  );

  ko.applyBindings(viewModel);
});
The view model is now being populated but there’s still nothing to see in our view - we need to add some HTML and start working with the knockout templating engine to get things to display.
Displaying Items using Knockout Templating
With knockout, the UI is data bound to the view model in order to generate HTML. https://knockoutjs.com/ has a wealth of documentation and examples on how to achieve this, but for this example we are going to use three bindings: foreach to iterate through each of the todo list items; text to display the name; and checked to display the completed state.
<ul data-bind="foreach: todoItems">
  <li>
    <span data-bind="text: name"></span>
    <input type="checkbox" data-bind="checked: complete" />
  </li>
</ul>
Refresh the page in a browser and you should now see something like this:
We now have the text and the completed state of the our two fake todo items. That’s all well and good, but what about when you want to get real data from the server?
Getting Real Data from the Server
In a single page application, data is acquired from the server using AJAX calls and our example today will be no different. Unfortunately, our server doesn’t support any AJAX calls at the moment, so our next step is to configure a URL that will return some data; in this case: todo list items.
Configuring API Calls using Express
We want to set up an API call on our node server that will respond with a JSON list of todo items for the URL:
GET /api/todosTo set this up in express we use the app.get method, which accepts a path as the first parameter – in this case /api/todos – and a callback as the second.
app.get('/api/todos', function(req, res) {
  //...
});
The callback will now be invoked whenever we browse to http://localhost:3000/api/todos. The two parameters on the callback are the request and the response objects, and we now want to use the latter to send JSON data back to the client.
Ordinarily you would be getting the data from some kind of backing store, but to keep things simple I’m just going to return a few fake items using the res.json method. Here we are passing in the HTTP response code (200 – OK) and our data, then calling the res.end method to finish the response.
res.json(200, [
  { name: 'Item 1 from server', complete: false },
  { name: 'Item 2 from server', complete: false },
  { name: 'Completed Item from server', complete: true }
]);
res.end();
Now let’s hook up our view model to access that data…
Getting the View Model Speaking to the Server
As our server now expects a GET call we can use jQuery.getJSON to load the data from the client side. Once we have the data, all we need to do is push it into our view model to update the UI.
var TodoListViewModel = function() {
  var self = this;
  this.todoItems = ko.observableArray();

  this.refresh = ko
    .command(function() {
      //make a call to the server...
      return $.getJSON('/api/todos');
    })
    .done(function(items) {
      //...and update the todoItems collection when the call returns
      var newItems = [];
      for (var i = 0; i < items.length; i++) {
        newItems.push(new TodoViewModel(items[i]));
      }
      self.todoItems(newItems);
    });

  //refresh immediately to load initial data
  this.refresh();
};
Note that I’ve used the command pattern in this example (to get some free loading indicators and error handling) but there’s no need to do so - a regular function would suffice.
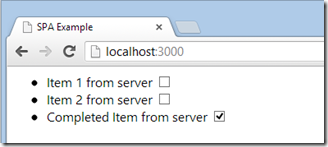
Restart node, refresh the page and you should now see the data returned from the server.
Sending Data back to the Server
We’ve managed to display data from the server, but what about if we want to save a change from the client?
Let’s add another API method that expects a PUT call to /api/todos/[id] with a body containing the JSON data. We’ll also need to add an id property to the fake data returned by the server so that we can reference it in the URL.
The configuration of the PUT URL looks very similar to the GET configuration from earlier.
app.put('/api/todos/:todoId', function(req, res) {
  //...
});
The only difference (besides the verb) is that our URL path now includes a parameter named “todoId”, signified by the prefixed colon. This will allow us to access the value of the ID appended to the URL through the req.params object.
Our handler will also need access to the body of the request, and to provide that we need to configure express to use its body parser:
app.use(express.bodyParser());Now we have access to the body of the request through the req.body property.
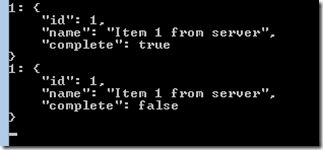
As our server doesn’t have a real backing store, there isn’t much we can do to actually process this call. To demonstrate that it is actually getting through we’ll just log the details to the node console and respond with a 200 - OK for the time being.
app.put('/api/todos/:todoId', function(req, res) {
  console.log(req.params.todoId + ': ' + JSON.stringify(req.body, null, 4));
  res.send(200);
  res.end();
});
We now need our view model to call this method whenever the value of the complete flag is updated by the user. First off, lets add another command that uses jQuery to make an AJAX call with the appropriate data.
var TodoViewModel = function(data) {
  // as before

  this.updateServer = ko.command(function() {
    return $.ajax({
      url: '/api/todos/' + data.id,
      type: 'PUT',
      contentType: 'application/json',
      data: JSON.stringify({
        id: data.id,
        name: self.name(),
        complete: self.complete()
      })
    });
  });
};
This one is a bit more verbose than the getJSON call earlier as we need to call the jQuery.ajax method directly in order to PUT data. It is also worth noting that the JSON object being sent is derived from the updated values for the name and complete fields from the relevant observables.
We can now use the subscribe method on the observable complete flag to ensure that this update function will be automatically invoked whenever the flag changes.
this.complete.subscribe(this.updateServer);Restart node, refresh the page, and try clicking on the check boxes. You should see confirmation of the successful call to the server in the node window.
Wrapping Up
This has only been a very simple example, but hopefully demonstrates the architecture of a single page application and how it can be implemented using node and knockout.
